Speculid
Product Information and Media Kit
Download Media Kit with PDF version
![]()
Speculid is a macOS application for developers. For developers in the Apple space, Xcode (the main developer application) requires particular file types and sizes for each image used. Whether the developer’s app is for iPad, iPhone, Mac, or the Apple Watch. Speculid can take a single SVG or PNG file and resize the file according to the sizes required for that app.
For instance, if you are building a universal app for all of Apple’s operating system (macOS, iOS, watchOS, tvOS, and CarPlay) that would require 41 separately sized png graphic files. With Speculid, you can take one SVG file and automatically generate each png file on build.
Developers can use Speculid for each time a graphic is updated. Additionally, they can trim their code repository of unneeded graphic files and just make Speculid part of the Continous Integration environment.
For questions, you can reach me:
- [email protected]
- @leogdion
- speculid.com
Installation
From Homebrew
If you already have Homebrew installed, you can simply install Speculid via:
brew cask install brightdigit/speculid/speculid
From Download
Download and install from here: https://github.com/brightdigit/Speculid/releases/download/v2.0.0-beta.4/Speculid.zip
Once you have downloaded the zip file (i.e Not Homebrew), go ahead and copy the application Speculid.App to the Applications folder.
A command line tool is included in the application bundle. Copy the command line tool to your /bin/ folder:
$ sudo cp /Applications/Speculid.app/Contents/SharedSupport/speculid /usr/local/bin
Usage
By Example
To try out the application you can use the example project, which can be downloaded here:
- https://github.com/brightdigit/Speculid-Example/archive/master.zip
-
Open the Xcode project and notice the missing png and pdf files.

- Open your Terminal application (ex. Terminal.app), and go to the project directory (i.e.
cd). - Run the
speculidcommand on theAssetsdirectory inside:speculid --process Assets
-
Go back to the Xcode project and you’ll notice all the png files and pdf files are there!

For Any Application
With Speculid, the process of building image assets can be automated in Xcode. Here is how to setup your project the first time:
-
Create the speculid file and add it to your project folder, along with your source graphic files.
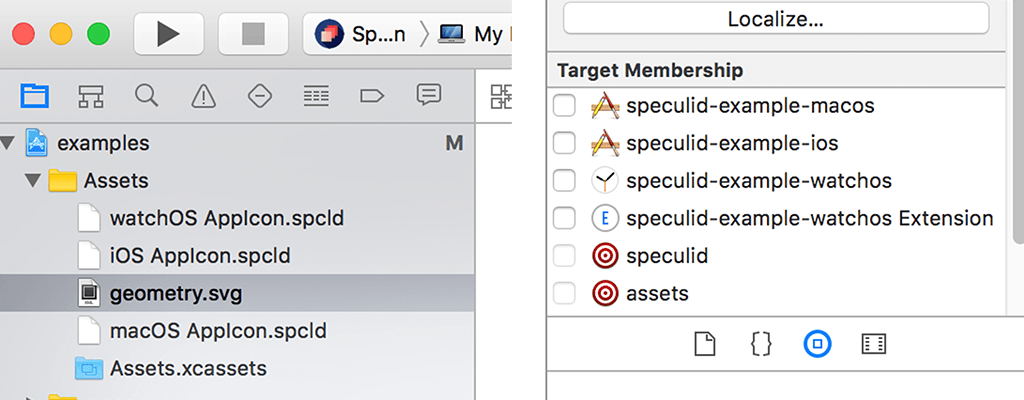
Note: you don’t need to add these files to any target membership
NEW skip to step 4 and use the
--initializeflag:$ speculid --initialize \ "Assets.xcassets/iOS AppIcon.appiconset" geometry.svg app-icon.speculid - In the speculid file, Add the property for the source - the path to the SVG or PNG file.
{ "source" : "geometry.svg", ... } - In the speculid file, Add the property for the set - the path to the Image Set or App Icon folder.
{ "set" : "Assets.xcassets/iOS AppIcon.appiconset", ... } - optional In the speculid file, Add the property for the geometry - if this a conversion from a vector graphic (SVG) to an Image Set, you may want to supply the 1x size.
  {
 "set" : "Assets.xcassets/Raster Image.imageset",
 "source" : "layers.png",
 "geometry" : "128"
  }
If you specify 128 in the geometry property, that means the width for the 1x image will be 128 pixels, the width for the 2x image will be 256 pixels, and the width for the 3x image will be 384 pixels. Heights will be calculated based on the aspect ratio of the SVG file.
Vector images in an image set will be converted to a iOS compatible PDF file.
- optional In the speculid file, Add the properties for the background color and alpha removal - if this a conversion to an App Icon, you should remove any background transparency and add a background color.
  {
 "set" : "Assets.xcassets/iOS AppIcon.appiconset",
 "source" : "geometry.svg",
 "background" : "#FFFFFFFF",
 "remove-alpha" : true
  }
See the file format section for more details.
-
Add the Run Script Build Phase to the top of your project with the following code:
speculid --process "${SRCROOT}"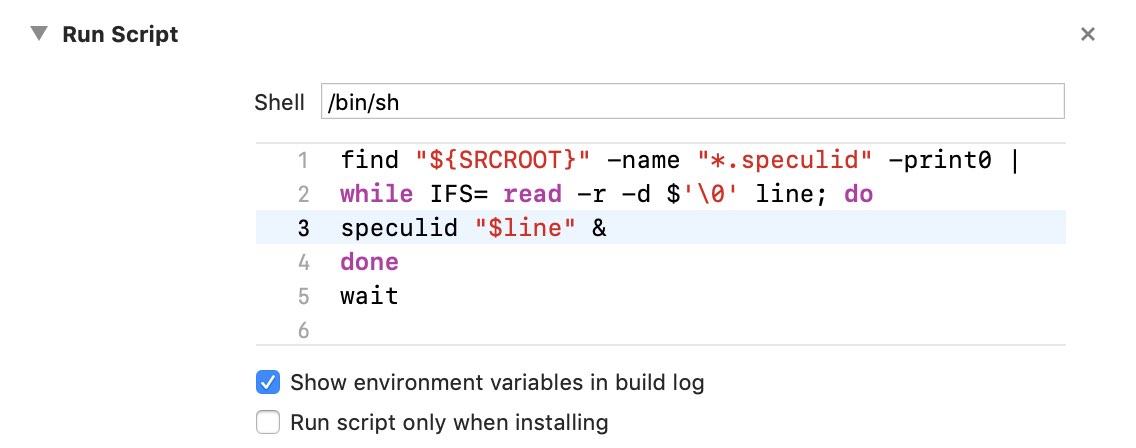
If you are using fastlane to build your application. You can use the plugin to build every
.speculidfile in your directory. -
Build the application. This will create the graphics which you will use in your asset image set or app icon.
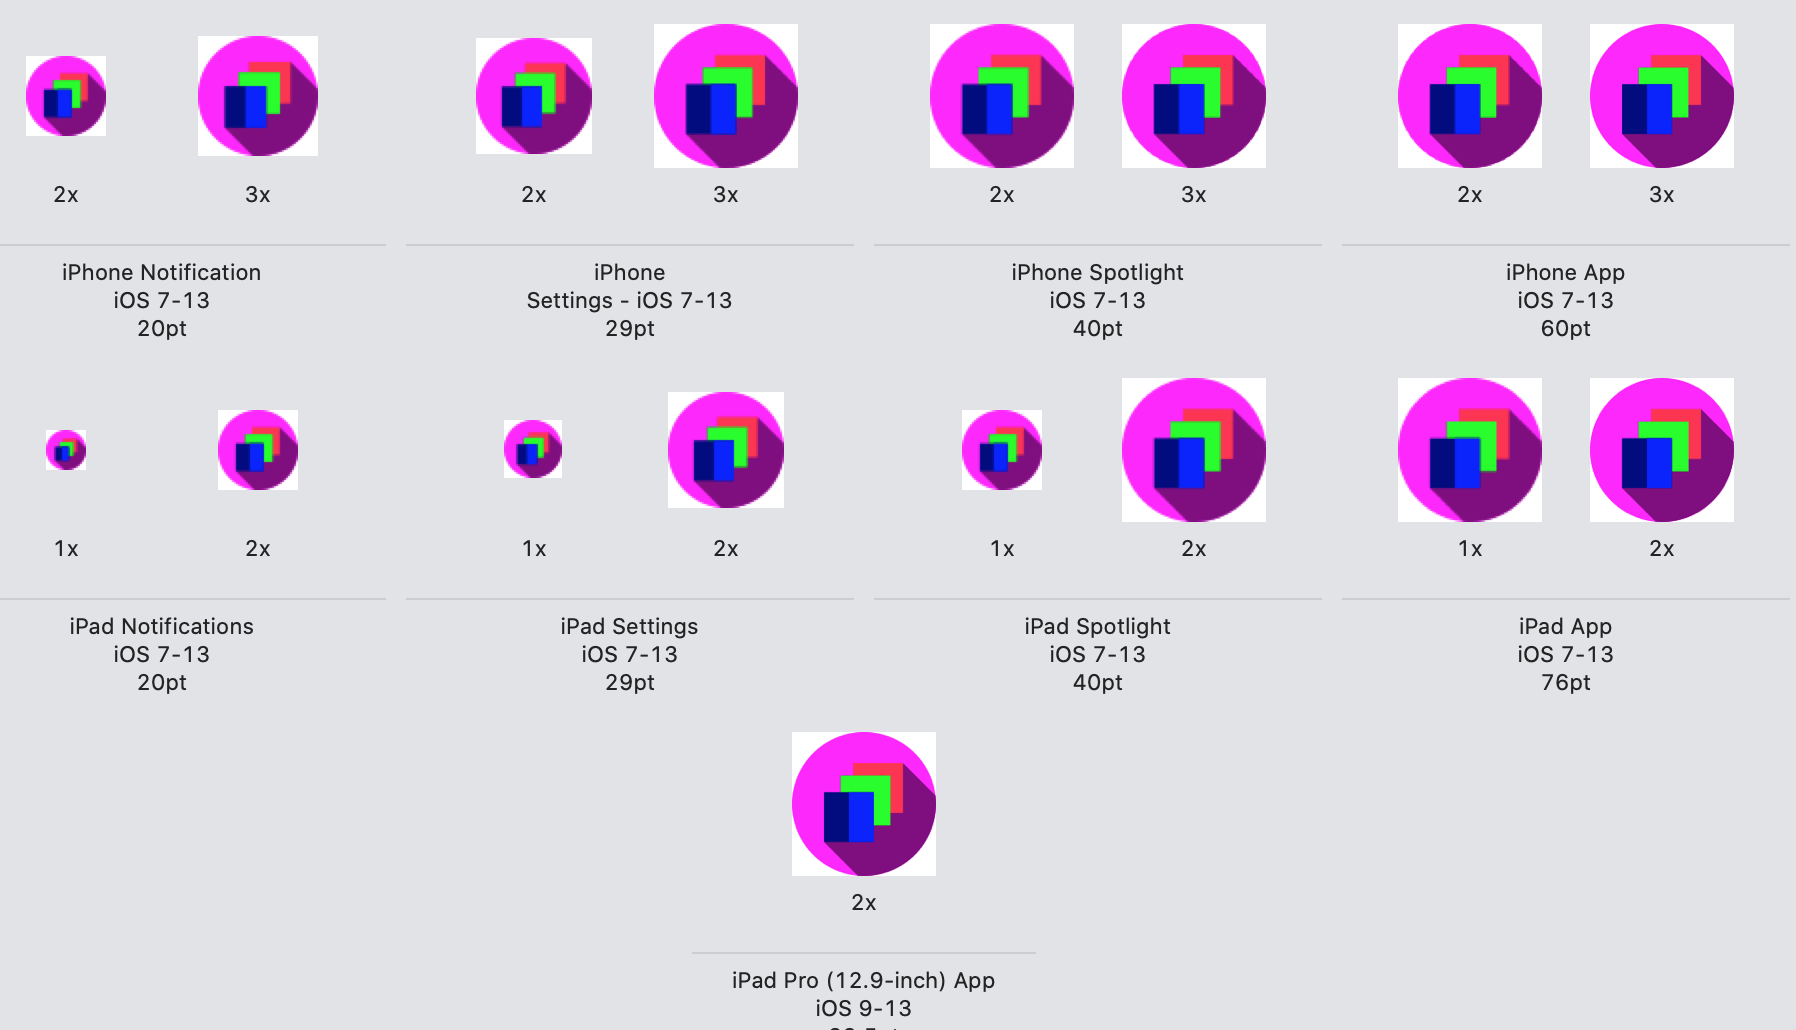
If the asset catalog does not already have file names for each image in the asset, Speculid will automatically update the asset catalog and name the files using the following pattern:
(source file base name).(size)@(scale)~(idiom).(extension)
Examples
- logo.20x20@1x~ipad.png - 20x20 size 1x scale for iPad
- logo.60x60@3x~iphone.png - 60x60 size 3x scale for iPhone
- logo.83.5x83.5@2x~ipad.png - 83.5x83.5 size 2x scale for iPad
- Enjoy!
Other Media
Videos
 https://raw.githubusercontent.com/brightdigit/Speculid/master/images/Speculid-In-Use.gif
- How to Get Started
- https://www.youtube.com/watch?v=Mn4pknYqzH0
- Live Demo - June 27
- https://www.youtube.com/watch?v=WmF8–qDUfk
- Speculid Demos 78,000 Images
- https://www.youtube.com/watch?v=thifChCnm6M
- Feature On Responder Chain
- https://www.youtube.com/watch?v=j5TA4C_VNc0
- Xcode Asset Generation Automation with Speculid by Peter Witham
- https://www.youtube.com/watch?v=U3Ytfh6tK7E
Logo
![]()
Download Available: https://github.com/brightdigit/Speculid-MediaKit/archive/master.zip Download Media Kit with Logos
Contact Info
![]() Email [email protected]
Email [email protected]
![]() Twitter @leogdion
Twitter @leogdion